My backyard garden now has 200 times more sun since we don't have our block's most hated maple tree anymore. It is doing amazing things for my vegetables--the sunchokes are already three times as tall as they were last September, lettuces are twice as big as they got last year, and the Red Russian kale plants that my friend Kelly gave me are so big that I need to harvest a bunch every few days or they start shading out other plants! Here's my mom with the kale I gave her last week.
Our 14 tomato plants are still small, but they're starting to grow. Brandywine, Currant, Sugar Sweetie, Black Plum, some unknown varieties that we think are going to be golden, German Pink...and I still want to plant a Sungold. Hybrid or no, it has the best tasting and most prolific tomatoes ever and keeps producing right up until it freezes.
We got a very heavy Priority Mail Flat Rate box from my girlfriend's dad in Arizona two weeks ago. We had an idea what might be inside--beautiful fresh grapefruits and lemons from his backyard! Lots and lots of them! We immediately made a delicious juice cocktail with grapefruit, lemon, and lime juice, agave syrup, mint, ice, and bubbly water. Then we ate dripping, juicy grapefruits breakfast, lunch, and dinner for a week. On a cold morning, broiled grapefruit halves with a sprinkle of brown sugar on top are a nice way to start the day! We've still got the last few lemons left, after hot honey lemonade (I like it instead of tea), lemony salad dressings, pretty lemon slices in our drinks, and more. Any recipe suggestions?
Another fun food adventure recently was a trip to Olympia for a housewarming party and to help my friend Rob get his garden in shape. He is a backyard farming inspiration to me and has been ever since we met in Japan nine years ago. We dug and planted and built a stage in his backyard...but mostly I cooked. Yeasted waffles (yum) and a recipe I will share with you--pickled carrots and radishes. My CSA, Sunroot Gardens, gave us all-we-could-eat radishes a couple of weeks ago and we've been eating these pickles ever since. They are similar to the pickles you get on a Banh Mi sandwich. The best thing about them is that if you let them sit overnight, the radishes turn all-over pink and the orange of the carrots is intensified to almost neon by the bleeding color from the red radish skins.
You'll need a wide mouth quart canning jar for this recipe.
Ingredients:
About 2 medium carrots, peeled and sliced into thin rounds (2 cups)
2 cups of sliced radishes, it's nice if some are red, but mixed colors are fine
3/4 cup rice vinegar
1/2 cup water
1/4 cup sugar
1 tablespoon sea salt
1/2 teaspoon each coriander seeds and black peppercorns
In a bowl, mix together vinegar, water, sugar, and salt until everything is dissolved. In the quart jar, put the coriander and peppercorns at the bottom, then layer the carrots and radishes on top, making several layers of each vegetable. Pour the vinegar mixture into the jar to covers the vegetables. Press the vegetable down in the jar so they are submerged in the liquid, then put the lid on and let the pickles sit for at least an hour, preferably overnight, and up to 2 or 3 weeks. Eat them on a sandwich, in a salad, alongside tacos, or just as a tasty snack. Just to warn you--when you open the jar, you will smell a putrid odor. This is normal. It comes from the radishes. You won't taste this taste at all when you eat the pickles! But I will concede that they taste best of all served outside at a picnic, with plenty of fresh air to blow the radish smell away.
Monday, May 31, 2010
Sunday, January 17, 2010
Crabapple Cottage: The Cookbook
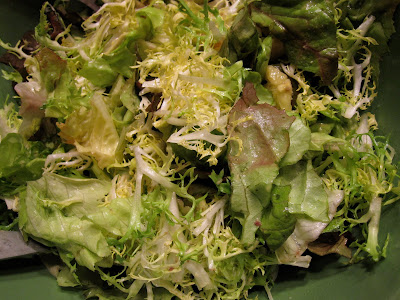
I started working on what will be an amazing cookbook someday--the collection of seasonal recipes that my housemates and I love to eat. We're all pining for spring, so we can have asparagus with poached eggs and hollandaise sauce again. In the meantime, there's lentil shepherd's pie...and my go-to winter salad, frisee and butter lettuce with avocado and oranges. It's simple--the only trick is that I cut the peels off the oranges and cut them into rounds, then squeeze the orange peels into my salad dressing bowl so that the dressing has a little orange juice in it. I usually make a quick vinaigrette with sherry vinegar, the orange juice, olive oil, dijon mustard, sea salt, and some chopped onion or shallot.
Since I get most of my vegetables from my year-round CSA, there are a lot of root vegetables in the fridge all winter...parsnips (they are huge, sweet, and delicious), sunchokes, beets, turnips, and sometimes carrots. This sometimes makes me fall into a borscht rut. I just learned that a spoonful of homemade fermented sauerkraut is really nice in a bowl of borscht. But variety is important...especially a variety of pot pies. To make lentil shepherd's pie, just take some of those winter storage vegetables (an onion, a parsnip, a couple of carrots, maybe a stalk of celery and a clove of garlic), chop them and sweat them in a small soup pot with a couple of tablespoons of olive oil or butter and some salt.
Meanwhile, boil a big pot of salted water and boil some potatoes--ideally Russets.
To your onion mixture, add a cup of French green lentils and a mixture of red wine and water to just cover the lentils. Throw in a tablespoon of tomato paste and a spoonful of veggie broth powder, maybe a shake of red chili flakes, a couple of bay leaves and a little chopped fresh rosemary. Cook until lentils are done, adding more water if needed, but you want the lentils to absorb most of the liquid by the time they're cooked.
By this time, your potatoes are probably good and soft. Preheat the oven to 350. Drain the potatoes and mash them with a lump of butter and a big splash of milk, and salt/pepper/red pepper to taste. I like to use the whisk attachment of my girlfriend's KitchenAid stand mixer to mash and whip the potatoes, but any way you want to do it is fine. If the lentil pot can go into the oven, you can do the next step right in the pot; otherwise, transfer the lentils to a baking dish. Mound the potatoes on top of the lentils, so that they make a crust. Put the shepherd's pie in the oven and bake for about 20 minutes, or until the potatoes start to turn a little bit brown in places (if you're getting impatient, just turn on the broiler for a minute). This recipe is flexible enough to absorb lots of different vegetables, and it's also tasty with any kind of cheese added to the mashed potatoes!
Monday, January 11, 2010
I invented Rice-A-Roni!
That's not quite true. I didn't invent Rice-A-Roni, but I did listen to a radio story about the invention of Rice-A-Roni and make a rice and noodle pilaf loosely based on the recipe that went with the story. And it was delicious, in a salty, starchy, buttery, comfort food kind of way. It was even good the next day as leftovers, and I usually hate leftovers.
I also invented a new Rice-A-Roni flavor: chanterelle mushroom and apricot. Everyone is always saying how chanterelles smell like apricots so I thought it might be a good combination, and it was. I made my own dried chanterelles after going mushroom hunting at Thanksgiving, so I had a big bag of those, and also a big bag of the most amazing dried apricots from the Santa Cruz farmer's market over Christmas. I kind of want to to buy the 25 pound bag for $180--they're that good. Here is the recipe:
1/2 of a small onion, finely chopped
1 small yellow carrot, diced into 1/4 inch cubes
1 cup long-grain white rice, like basmati
1/2 cup vermicelli noodles, broken into small pieces
1 handful dried chanterelle mushrooms, also broken into small pieces
3 tablespoons butter
2 1/2 cups water
1/4 cup white wine
Vegetable broth powder to taste (I really love Rapunzel brand)
Salt to taste
A tablespoon of fresh chopped parsley
5 dried apricots, finely diced
Add the butter, onion, and carrot to a medium-small saucepan with a tight-fitting lid. Cook over medium-high heat until onion is translucent, about five minutes, then add rice and vermicelli pieces and cook for a few more minutes, until they are nicely coated with butter and beginning to turn golden in spots. Add the dried chanterelles, wine, water, and vegetable broth powder; taste. The water should taste fairly salty. If it doesn't, add more broth powder or salt.
Put the lid on the pot, turn the heat down to low, and cook, undisturbed, for 15 minutes. Check and see if the rice and noodles are done and the water is all absorbed. If not, put the lid back on and cook for five to ten more minutes. Once the pilaf is done--rice and noodles tender but not soggy, liquid absorbed--add the parsley and diced apricots and gently mix into the pilaf. Fluff up the rice with a fork and serve.
Labels:
apricots,
chanterelles,
comfort food,
kitchen sisters,
rice,
rice-a-roni
Tuesday, January 5, 2010
Impossible Persimmon-Apple Pie
I'm taking a break from refined sugar to recover from the holidays, but the smell of my housemate's homemade banana bread today gave me a powerful urge to bake something sweet. I used ingredients I had on hand and the memory of Bisquick Impossible Blackberry Pies that I used to make back in high school, and came up with this highly successful recipe!
They called it "Impossible Pie" because it's impossibly easy, and also because you pour batter into the bottom of a pie plate, and it rises up partially over the fruit during baking to make a top crust too. Impossible! It's basically a moist, eggy cake with fruit baked in, a little bit like a pudding cake.
Here's a picture of the slice that's packed in my lunch for tomorrow:
Impossible Persimmon-Apple Pie
"pie crust" ingredients:
Handful of hazelnuts
3/4 cup all-purpose flour
2 teaspoons baking powder
2 Tablespoons melted butter
3/4 cup milk
2 eggs
Generous dash of cinnamon
1 soft-ripe persimmon
"pie filling" ingredients:
3 tasty apples, peeled and thinly sliced (I used two yellow and one green) + 1/2 red-skinned apple (I used Braeburn, which was good because it held its shape), skin left on and chopped
1/4 cup raisins, soaked for 15 minutes in water or juice if you have time
1 tablespoon butter or more if needed
Start by preheating the oven to 400 degrees. Then throw the hazelnuts in the blender and blend for a few seconds to chop them. Add the rest of the "pie crust" ingredients and blend until smooth, about ten seconds.
Meanwhile, saute the apple slices in the 1 tablespoon butter until they begin to caramelize. Add the chopped apple (you want it to stay more intact) and the raisins, and cook for another minute or two, then remove from heat.
Into a greased cast-iron pan or pie plate, pour the "pie crust" batter. Distribute the apple and raisin mixture on top, place the whole thing in the oven, and bake for about 30 minutes, until a skewer poked into the middle comes out clean and the crust is nice and brown. Let cool for at least a few minutes before cutting. Serve warm or at room temperature.
This cake was nice and sweet, and it didn't need more sugar at all! It was also fast and really easy. If you don't have persimmon, you might try putting in another soft, sweet fruit like a banana or some applesauce.
Monday, December 28, 2009
Post-Holiday Salad Days
I am proud to say that I'm still eating local fruit that I picked myself at the end of December! Two kinds of persimmons and kiwis--if only I had an orange tree too.
I've been visiting my family for the past week, and resolved to eat salad every day to counteract my all-cookie meal plan of the past month or so. It's been great! If you haven't had salad with spicy greens, grapefruit, and avocado for a while, you should make it.
Labels:
avocado,
christmas,
cookies,
grapefruit,
kiwi,
local produce,
persimmons,
winter
Wednesday, December 2, 2009
Cozy Chocolate
Who here knows agrees with the statement "Chocolate chip cookies DON'T COUNT. They are NOT holiday cookies!"?
It has only come to my attention over the past month that I, in fact, do not understand holiday cookies. But I'd better learn fast, because I'm going to a holiday cookie party this Saturday and I'm expected to bring NINE DOZEN cookies.
Some of my friends Ann and Alyssa's cookie recommendations:
Turtles
Triple Layer Chocolate Mint Fudge
Andes Mints cookies
Dyed-green cornflake and marshmallow wreaths with red-hot decorations
Russian Tea Cakes
Chocolate-dipped mini pretzels
None of the cookies I was thinking of making got the Midwest thumbs-up (I wanted to make those powdered sugar covered chocolate cookies or biscotti, which are at least actually cookies, unlike SOME holiday "cookies" I could mention) so I thought I might make peppermint marshmallows, using this recipe that Theresa was really into a few years ago. That was back when we all thought that Emes Kosher-Jel gelatin was vegetarian. Turned out, it wasn't, but we still have a jar from the good old days, so I made a test batch. If you do make this recipe, please note that it will make about eighty 1-inch-square marshmallows. And don't try to double it or it won't fit in your stand mixer!
Oh, lovely homemade marshmallows! I want to eat all of them myself in twenty cups of hot chocolate.
Speaking of which, I have a new hot chocolate recipe. My girlfriend always complains that what I drink is not hot chocolate, it's DRINKING chocolate, because I like it to be noticeably thicker than milk and really chocolaty. My new method is to throw a small handful of bittersweet chocolate chips into a cup of milk, microwave for 1 minute, stir really well, microwave 30 seconds more, stir, then 20 seconds more (watching like a hawk so it doesn't boil over), and stir like crazy until it's perfectly smooth and a little bit thickened. It's not too sweet, it has a great texture and plenty of chocolate, plus it's easier and less messy than cocoa powder! I put my marshmallows on top for the final 20 seconds, because homemade marshmallows don't melt as easily as your supermarket varieties do.
Labels:
candy,
chocolate,
cookies,
cooking,
holiday cookies,
hot chocolate,
marshmallows
Friday, November 20, 2009
Experiments
Even though I usually think of cooking as a solo activity--something I do when I'm alone in the house, or to decompress for an hour after a stressful day--I also like to cook with friends. It's good for me, because I learn other people's tricks and favorite flavor combinations, and I end up making things I wouldn't come up with on my own. Case in point: cooking with Martin the other day. I had officially declared it "sandwich night" at my house, but also had a date to hang out with Martin all afternoon and cook, so we invented a sandwich filling. A crazy sandwich filling. Rutabacon!
Yes, it's bacon made from rutabaga. I can't give you a recipe, but I can tell you that we sliced all the root veggies we could find (carrot, parsnip, sweet potato, rutabaga, celeriac, etc) into thin, bacon-shaped strips, marinated them in a nice salty, oily sauce that was really a bit more like barbecue sauce than bacon flavoring, and cooked the strips on a cast-iron griddle until they were good and burnt the way bacon should be. They made a great rutabacon, arugula, tomato, and avocado sandwich that I wanted to take a picture of, but couldn't find my camera and I was too hungry to go searching for it!
Subscribe to:
Posts (Atom)